UltraGauge+
Ultrasonic
Measurement
Solutions
Real-Time Ultrasonic Thickness Measurement & Gauging Solutions
The HMI center provides a very functional work center for your UltraGauge+ measurement system. A typical configuration includes dual touchscreen monitors, mounting for your ultrasonic sensor assembly and laser micrometer, and an enclosure for the safe operation of associated electronics, all on a mobile base with locking casters. The HMI center is available with several options to accommodate your unique needs, and its compact footprint seamlessly integrates into your manufacturing environment.
The UltraGauge+ product line offers a variety of sensor assemblies and accessories to support different production processes and environments, making it a versatile solution for manufacturers of high-specification products.
The UltraGauge+ systems are designed, manufactured, and assembled in the US.
Increase Yield and Reduce Waste
LaserLinc’s UltraGauge+ series can be tailored to fit specific product types, production environments, and other unique needs. It is commonly installed on an extrusion production line for continuous in-process measurement. With precise real-time wall and concentricity measurement, operators can adjust extrusion die bolts to improve concentricity within minutes after startup, increasing yield while reducing downtime and waste.
We make it easy to measure your high-specification products, leading to increased production yield. This ability provides a variety of benefits, including:
- Shorter startup cycles
- Reduced material usage
- Improved product quality
- Reduced costs
Advanced Thin Wall Measurement
One of the key advantages of LaserLinc’s UltraGauge+ technology is its ability to measure thin-wall thickness. This solution has successfully measured wall thicknesses as small as 0.001 inches (25 μm) for micro polymer medical tubing and 0.003 inches (75 μm) for metal nickel-titanium (NiTi/Nitinol) stent tubing.
The UltraGauge+ product line includes a variety of sensor assemblies and accessories designed to support different production processes and locations on the production line.
Model
UG412
UG430
UG460
Measurement Points
4
4
4 – 8
Outer Diameter (OD) Low Frequency
0.25-11.4 mm [0.01-.45 in]
0.51-29.2 mm [0.02-1.15 in]
6.35-60 mm [0.25-2.3 in]
Outer Diameter (OD) High Frequency
0.25-7.62 mm [0.01-.30 in]
0.51-19.05 mm [0.02-.75 in]
0.102-25.4 mm [0.003-1 in]
Wall Thickness Range Low Frequency
0.0762-5.08 mm [0.003-.2 in]
0.0762-12.7 mm [0.003-.5 in]
0.102-25.4 mm [0.003-1 in]
Wall Thickness Range High Frequency
0.0255-1.27 mm [0.001-.05 in]
0.0255-1.27 mm [0.001-.05 in]
0.0255-1.27 mm [0.001-.05 in]
Tank Configurations
Freestanding & Tank-Mounted
Freestanding & Tank-Mounted
Tank-Mounted
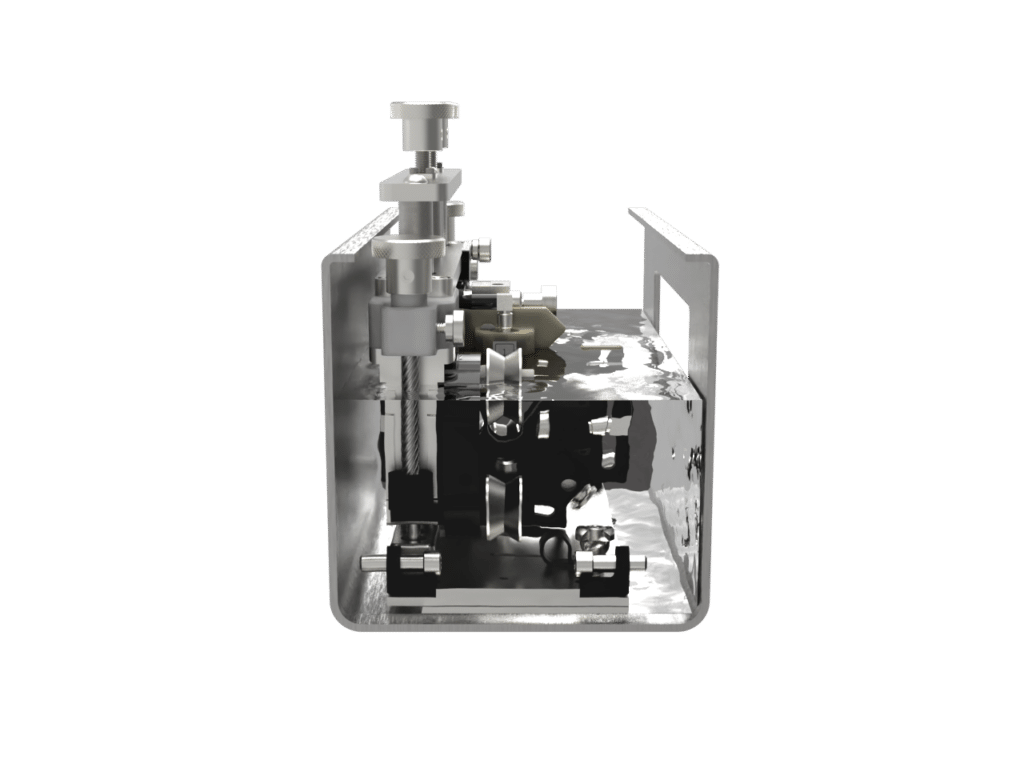
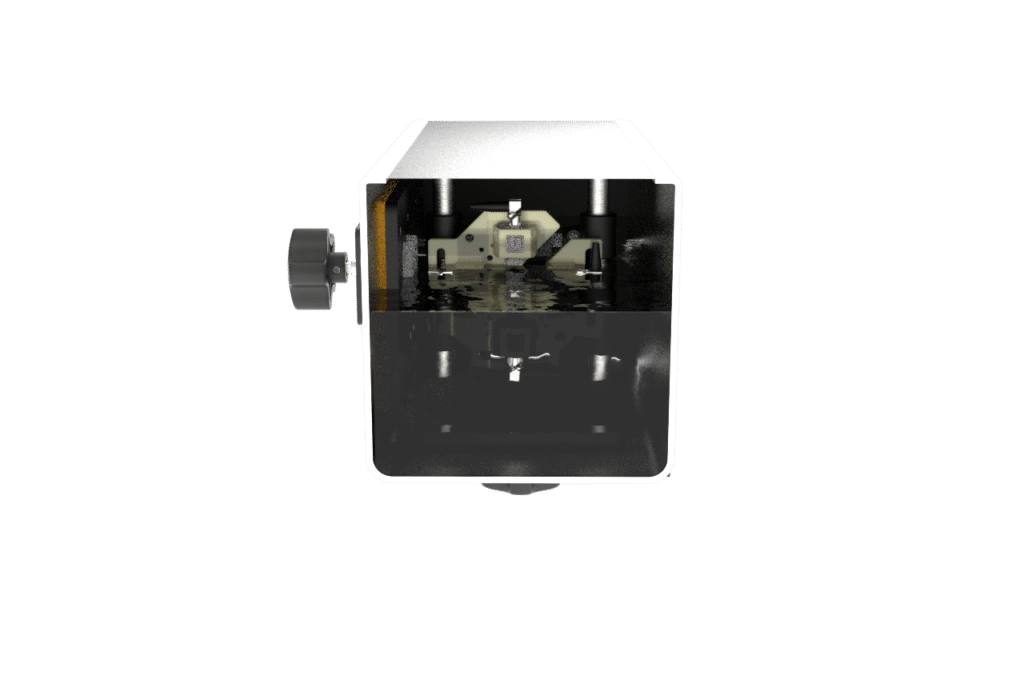
Freestanding
Tank-Mounted
The Freestanding configuration offers flexibility, easy access, and adjustment, effective part guiding, and efficient setup.
The closed tank configuration is specifically designed for accurately measuring products in a vacuum or closed tank setting. Its mounted design facilitates easy adjustments and effective part guiding from additional tank-mounted roller guides while maintaining a sealed environment.
Even greater precision with more comprehensive measurements
LaserLinc’s UltraGauge+ systems can be paired with LaserLinc’s laser micrometers to measure outside diameters, allowing for accurate OD, ovality, and ID measurements. This integration of technologies enables operators to gather precise in-process measurements, further decreasing material usage, enhancing product quality, and speeding up startup cycles.
We offer a diverse selection of Laser Micrometers designed to suit your specific requirements. Use the tab to compare options and discover the best micrometer to match your needs.
UltraGuage+ Accessories
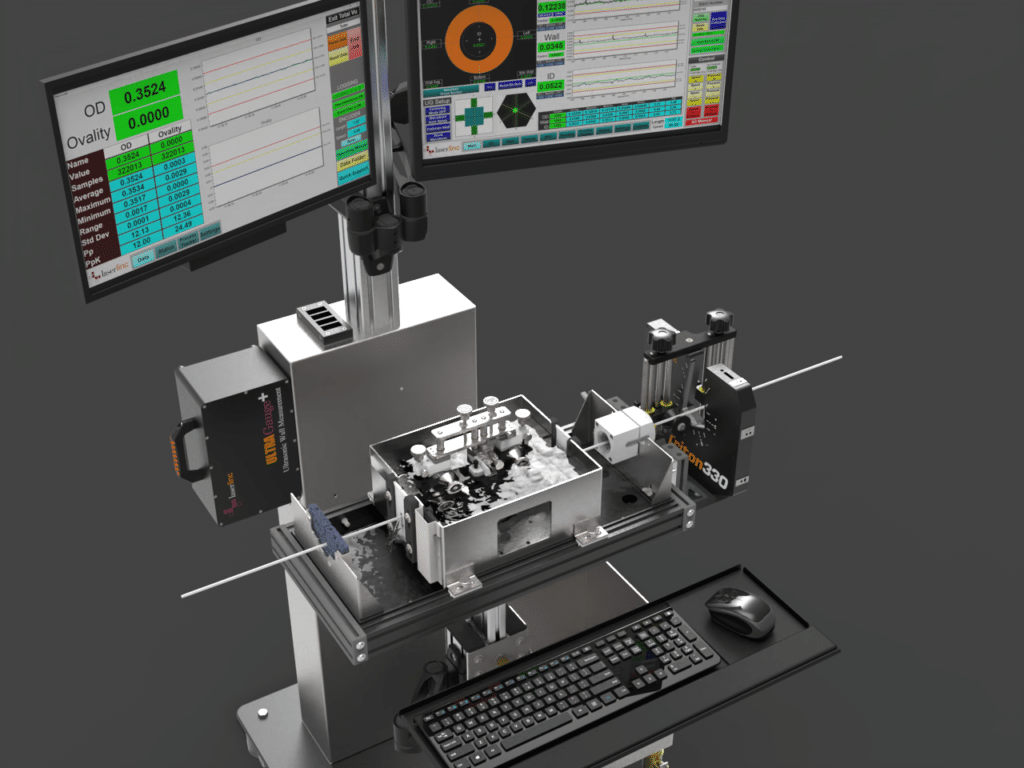
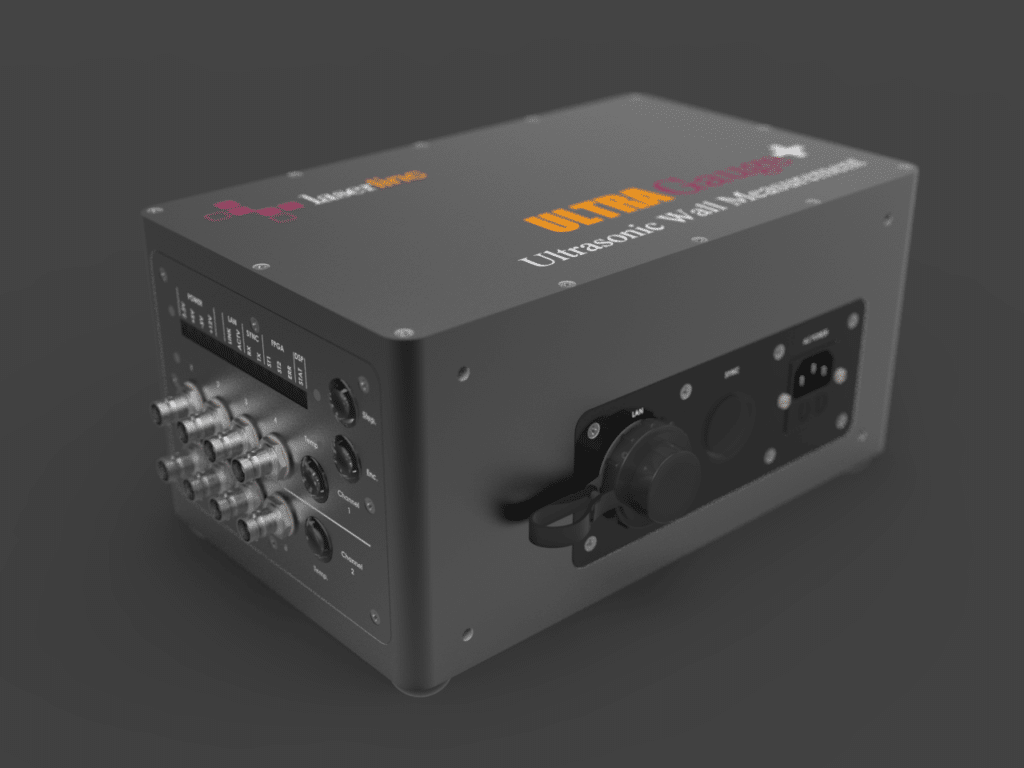
HMI UltraGauge+ Measurement Center: Seamlessly accommodates your unique setup needs, providing space for your UltraGauge+ configuration with a micrometer, PC, monitors, and more—all within one easy-to-use mobile form. With a wide range of customizable and add-on options, the HMI center can easily integrate into your workflow and be tailored to your specific requirements. This station integrates your ultrasonic thickness meter, wall thickness measurement tools, and data processing systems all in one compact footprint.
UltraGauge+ Processor: features 4 or 8 ports, an Ethernet connection to the host, an IP65 rating, and switch-selectable power requirements of 115VAC at 60Hz with 0.40A or 230VAC at 50Hz with 0.20A.
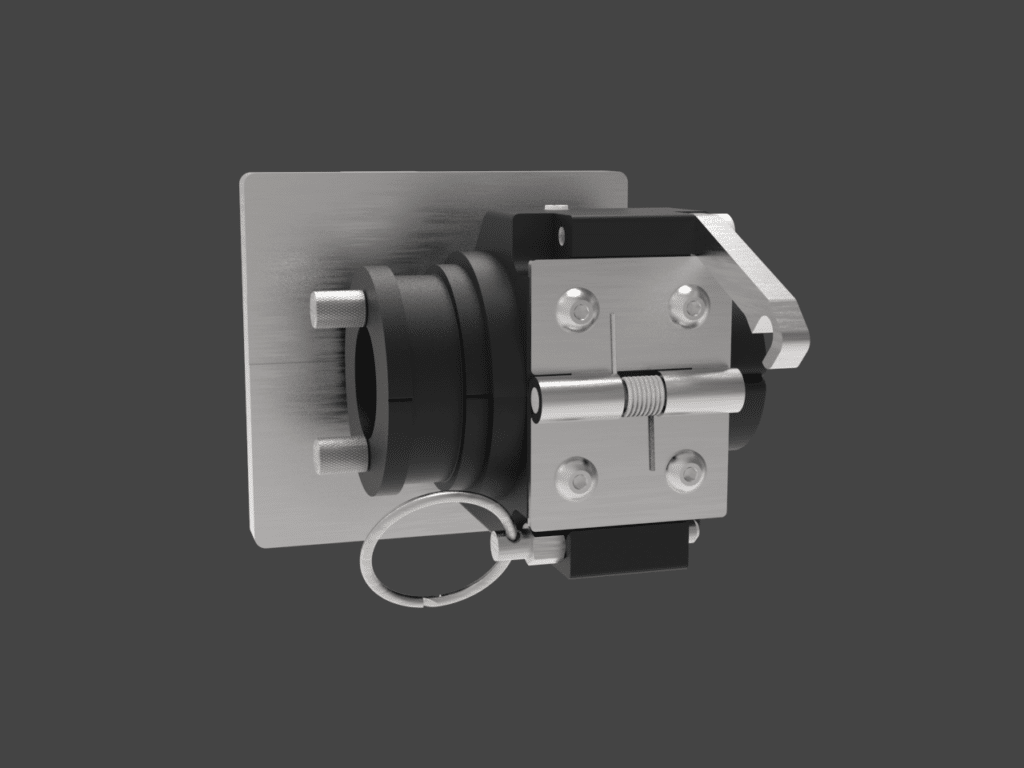
UG412 & UG430 Part Guiding Clamshell: Achieve optimal performance with part guidance tailored for freestanding configurations.
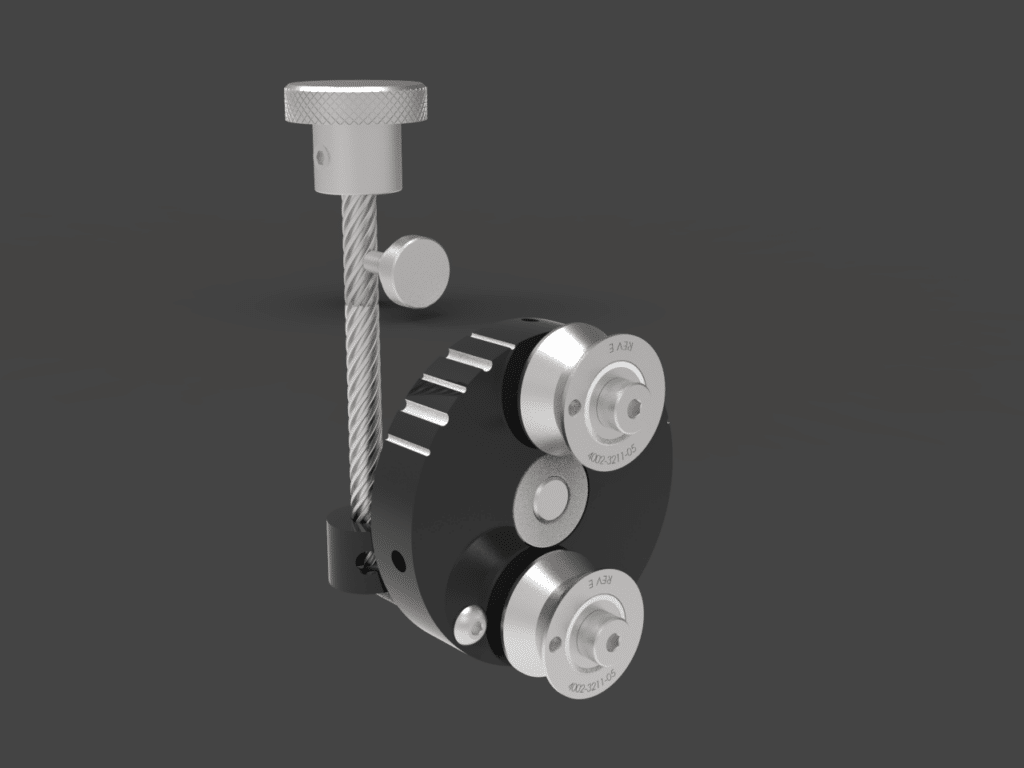
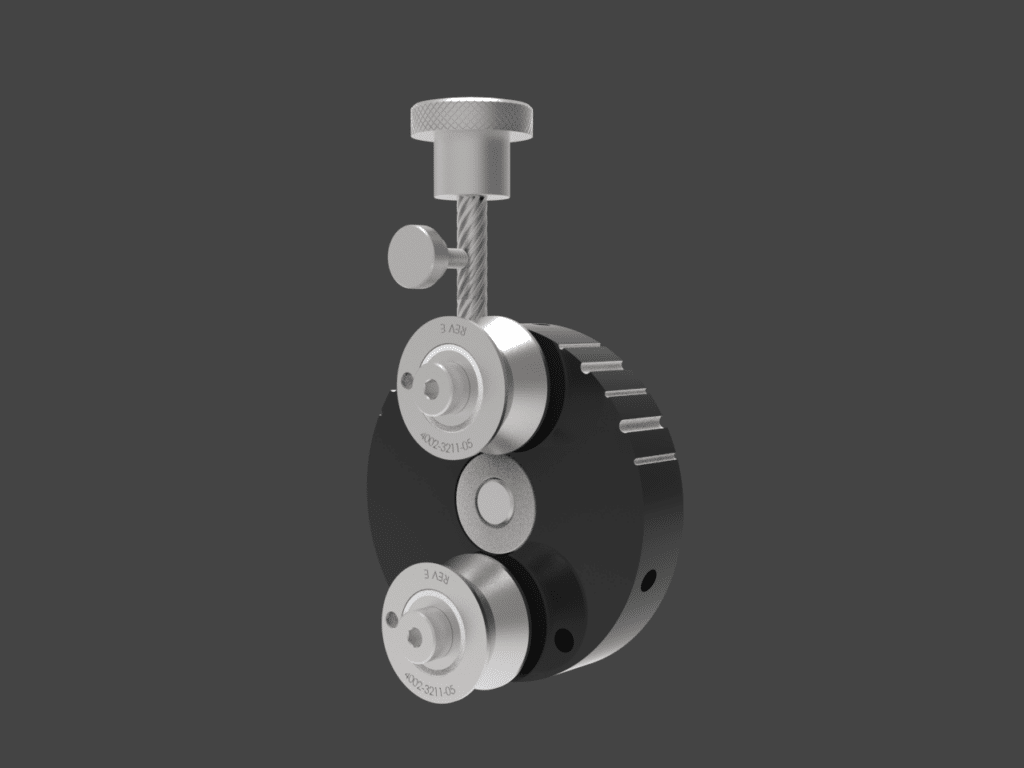
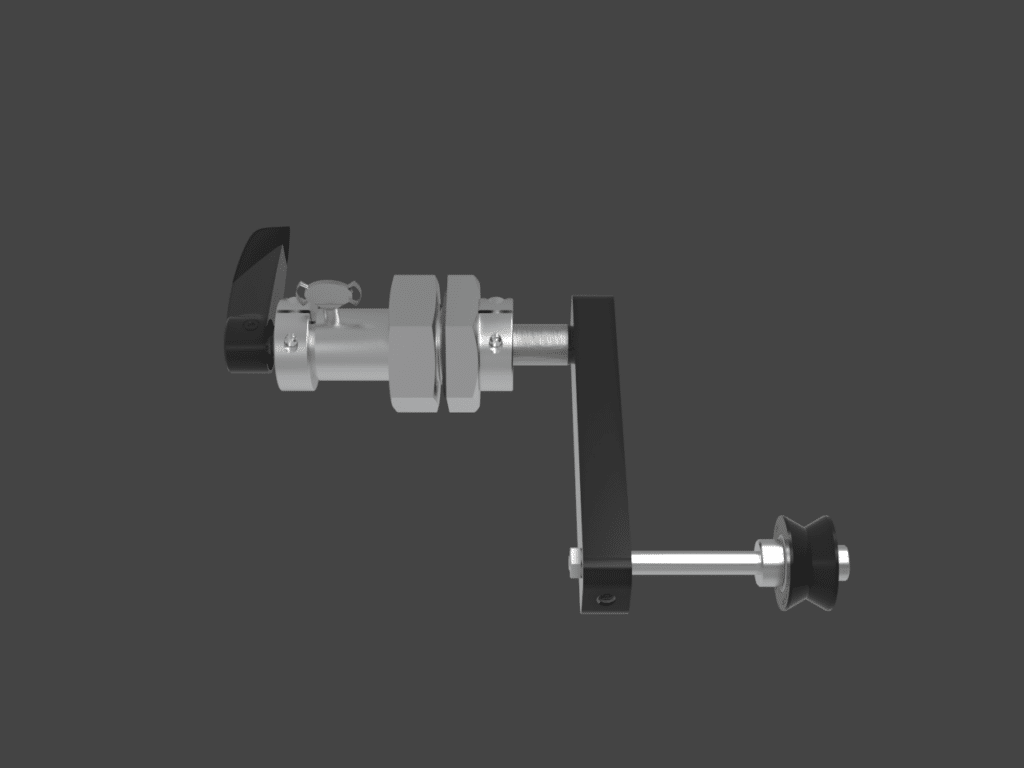
Tension Roller Guide: Left-mount adjustable pair of stainless steel tension roller guides to stabilize the product in the measurement field. Rotational and height adjustments allow for the precise product positioning of both floating and sinking products. Adjustment includes tension locking for improved product stability. Available for freestanding configurations.
Tension Roller Guide: Right-mount adjustable pair of stainless steel tension roller guides to stabilize the product in the measurement field. Rotational and height adjustments allow for the precise product positioning of both floating and sinking products. Adjustment includes tension locking for improved product stability. Available for freestanding configurations.
Part Guiding Roller Guides: Supports up to 3 lbs of downward force. Multiple roller guides can be used to distribute the load in both freestanding and tank-mounted configurations.
Common Line Setup: Tubing manufactured with cooling tanks
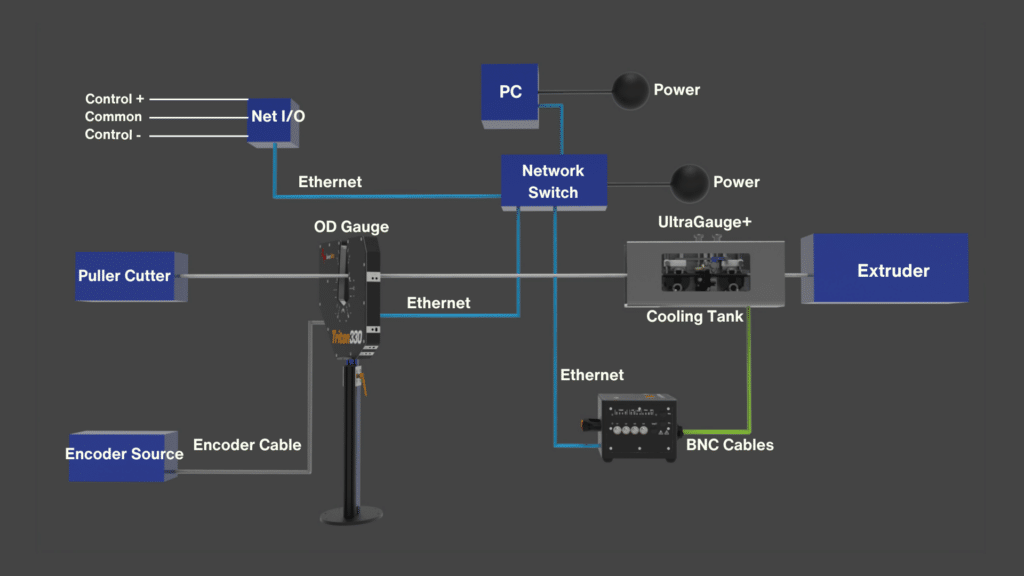
Learn the benefits of utilizing UltraGauge+ on the extrusion line
Ultrasonic Operating Principle
Ultrasound is a sound wave with a frequency higher than the upper limit of human hearing (approximately 20 kHz). LaserLinc uses ultrasonic frequencies from 2.25 MHz to 50 MHz.
Contact LaserLinc and speak with an applications engineer to help determine the best sensor assembly options for your application. Our ultrasonic thickness testers leverage high-frequency sound waves for precise wall thickness measurement, commonly used in ultrasonic metal thickness inspection, pipe thickness testing, and non-contact thickness measurement applications.
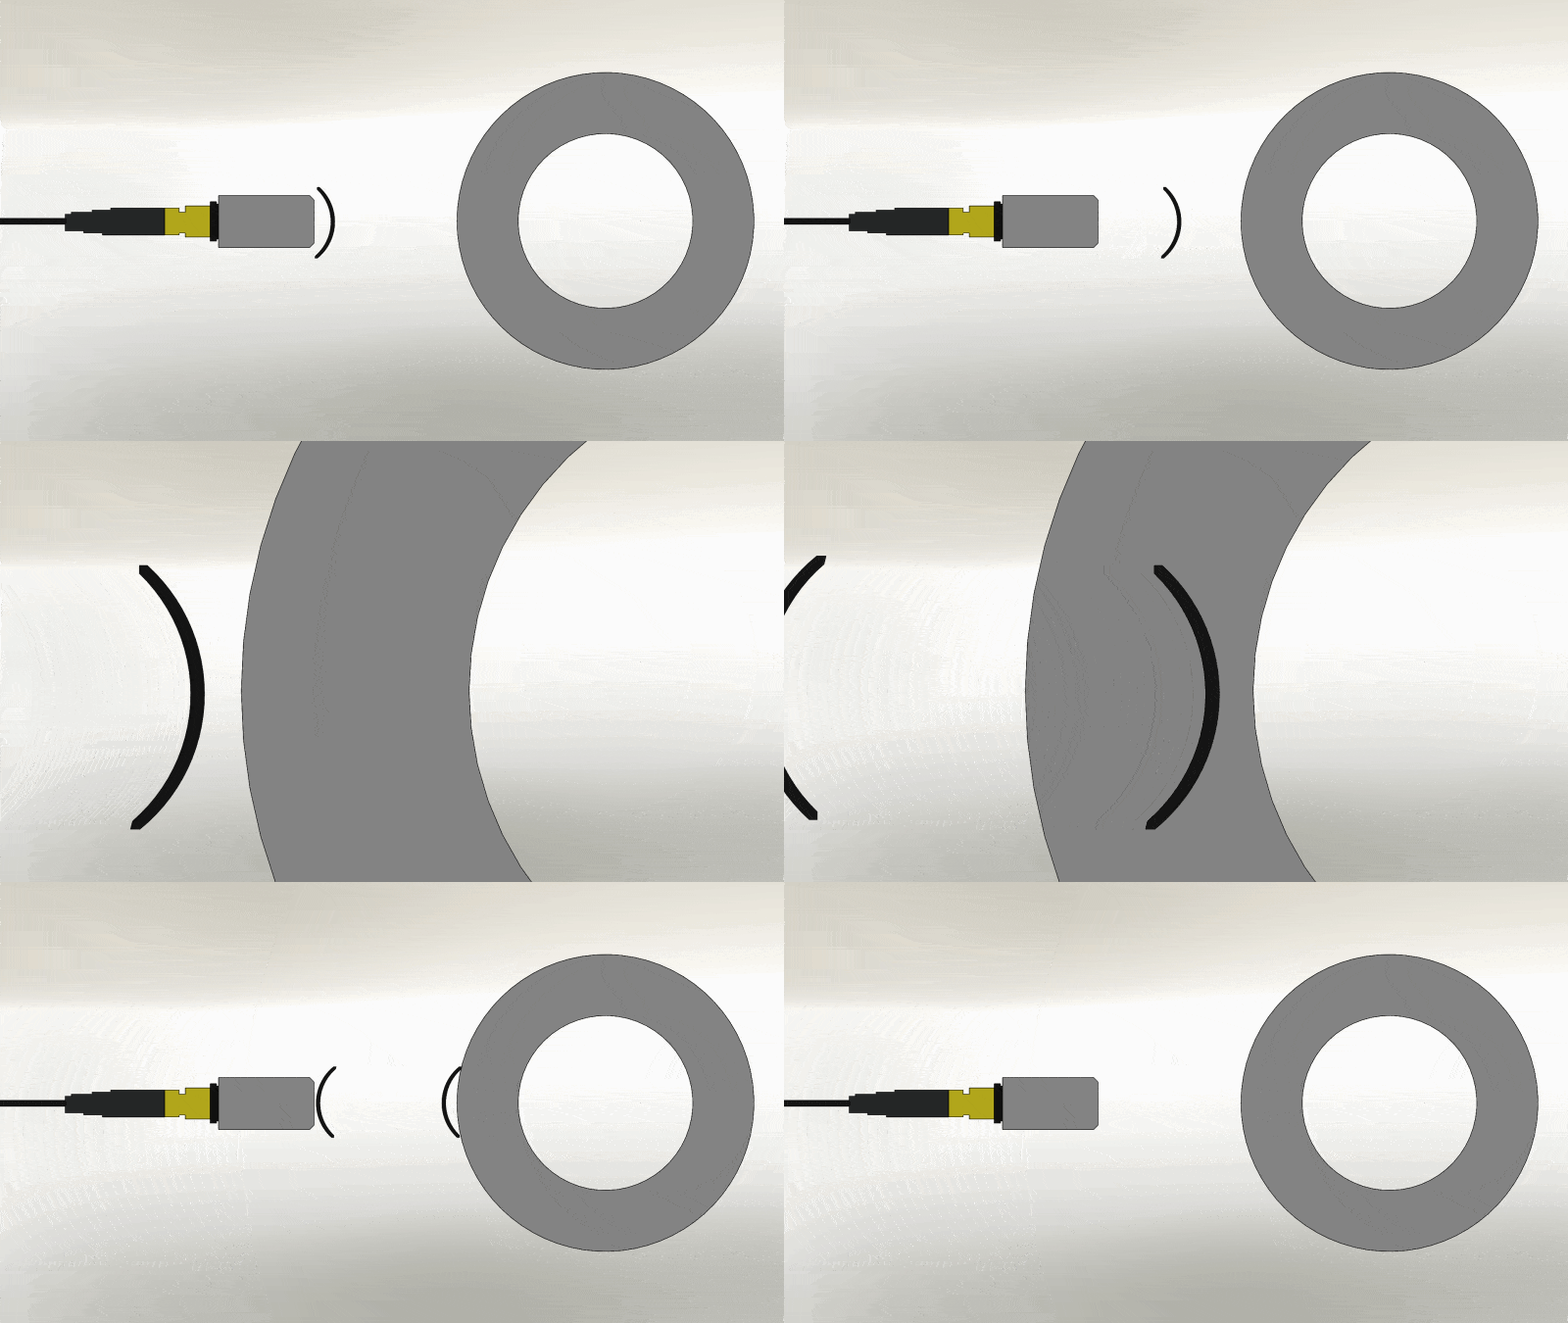
Single-layer ultrasonic measurement involves a high-frequency sound wave transmitted from a transducer to the product. When the sound wave hits the surfaces, it generates echoes. The time difference between these echoes correlates with the product’s thickness.
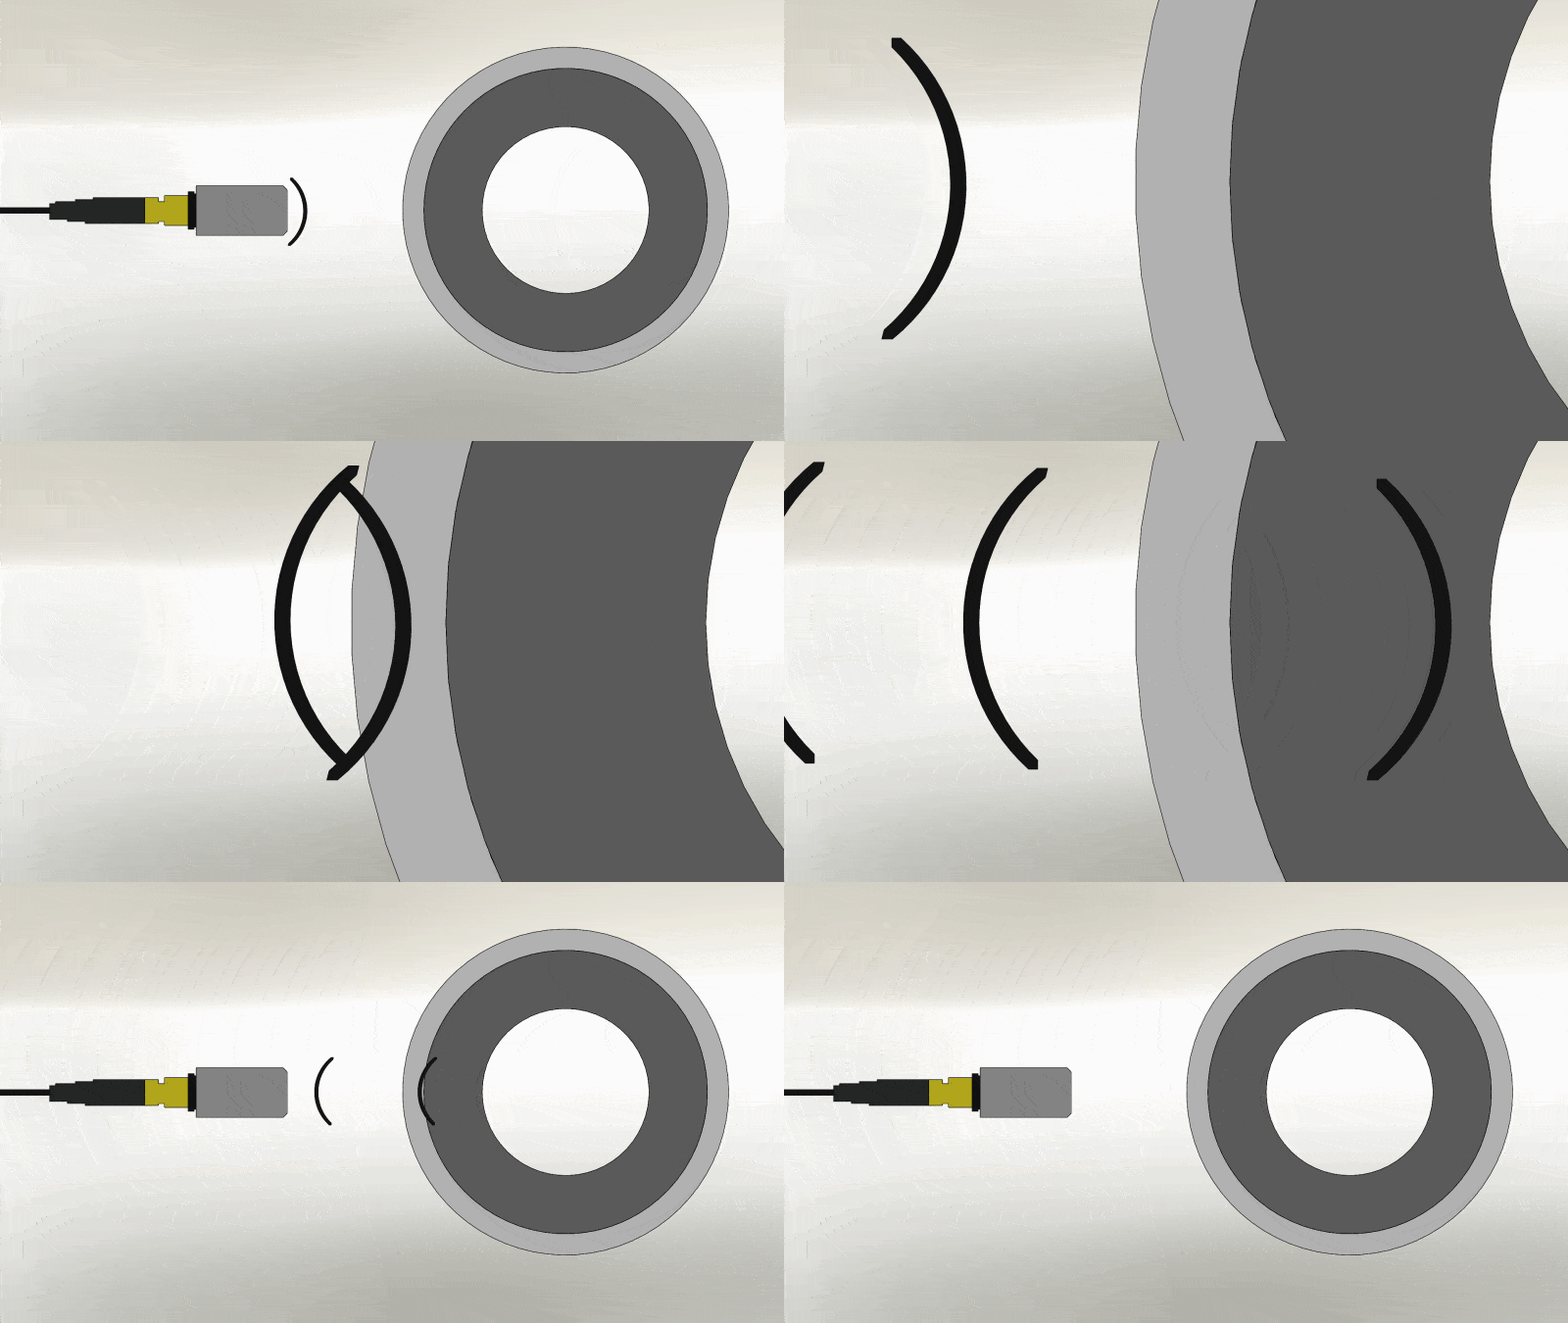
A multi-layer ultrasonic measurement involves a high-frequency sound wave from a transducer that measures the product by generating echoes as it strikes surfaces and internal layers. The time between these echoes is proportional to layer thickness. Typically, multiple transducers are used at various angles or locations for multiple measurements.
Measurement Parameters
Model
UG412
UG430
UG460
Measurement Points
4
4
4 – 8
Outer Diameter (OD) Low Frequency
0.2-11.4 mm [0.01-.45 in]
0.5-29.2 mm [0.02-1.15 in]
6.3-60 mm [0.25-2.30 in]
Outer Diameter (OD) High Frequency
0.2-7.6 mm [0.01-0.30 in]
0.5-19.1 mm [0.02-0.75 in]
6.3-60 mm [0.25-2.30 in]
Wall Thickness Range Low Frequency
0.08-5.08 mm [0.003-0.20 in]
0.08-12.7 mm [0.003-0.50 in]
0.10-25.4 mm [0.003-1 in]
Wall Thickness Range High Frequency
0.02-1.3 mm [0.001-0.05 in]
0.02-1.27 mm [0.001-0.05 in]
0.025-1.27 mm [0.001-.05 in]
*Wall thickness ranges are approximate and dependent on material properties, transducer frequency, style, and, in some cases, orientation.
*Low Frequency = 2.25 – 20 MHz / High Frequency = 30 – 50 MHz.
Freestanding Parameters
Model
UG412
UG430
Length
217.5 mm [8.56 in]
217.5 mm [8.56 in]
Width
98.4 mm [3.87 in]
114.3 mm [4.50 in]
Height
175.6 mm [6.91 in]
198.4 mm [7.81 in]
Tank Length
223.82 mm [8.81 in]
231.7 mm [9.12 in]
Tank Width (Minimum)
101.6 mm [4 in]
120.6 mm [4.75 in]
Minimum Water Level
68.4 mm [2.69 in]
92.2 mm [3.63 in]
Tank-Mounted Parameters
Model
UG412
UG430
UG460
Length
193.8 mm [7.62 in]
193.8 mm [7.62 in]
193.8 mm [7.62 in]
Width
111.1 mm [4.37 in]
114.30 mm [4.5 in]
159.3 mm [6.27 in]
Height (Minimum)
142.9 mm [5.62 in]
142.9 mm [5.62 in]
187.20 mm [7.370]
Minimum Water Level (at bottom of adjustment)
87.6 mm [3.45 in]
95.2 mm [3.75 in]
113.0 mm [4.45 in]
Minimum Water Level (at top of adjustment)
100.3 mm [3.95 in]
107.9 mm [4.25 in]
125.7 mm [4.95 in]
For complete specifications and technical information, please refer to the UltraGauge+ datasheet.
